Why Make Your Own Apple Cider Vinegar?
Store-bought ACV works fine for salad dressings. But raw, unfiltered apple cider vinegar made at home has something commercial versions rarely do: a living mother, complex acidity from a real two-stage fermentation, and an apple flavor that reflects what you started with. If you have access to good apples — or just apple scraps from baking season — homemade ACV is one of the most satisfying fermentation projects you can take on.
It also demystifies a process that seems opaque when you buy it from the store. ACV is just fermented apple juice, taken one step further than hard cider. The same biology that turns grape juice into wine and then into wine vinegar applies here.
Understanding the Two Stages
Apple cider vinegar requires two separate fermentation stages. Most ferments only need one. ACV is worth understanding at a process level because if you skip or rush either stage, you end up with something that tastes off or doesn't reach proper acidity.
Stage 1: Alcoholic Fermentation
Wild yeast (present on the apple skins and in the air) consumes the sugars in the apple scraps or juice and produces alcohol. The result after 2–3 weeks is essentially a rough, low-proof hard cider. This stage is anaerobic — the yeast prefers low-oxygen conditions. You stir daily to keep the solids submerged, but you don't seal the jar airtight.
Stage 2: Acetification
Acetic acid bacteria (AAB) — primarily Acetobacter species — consume the alcohol produced in stage one and convert it into acetic acid, which is what gives vinegar its sharp taste and preserving power. This stage is aerobic: the bacteria need oxygen to do their work. You cover the jar with breathable cloth and leave it undisturbed. The mother forms during this stage.
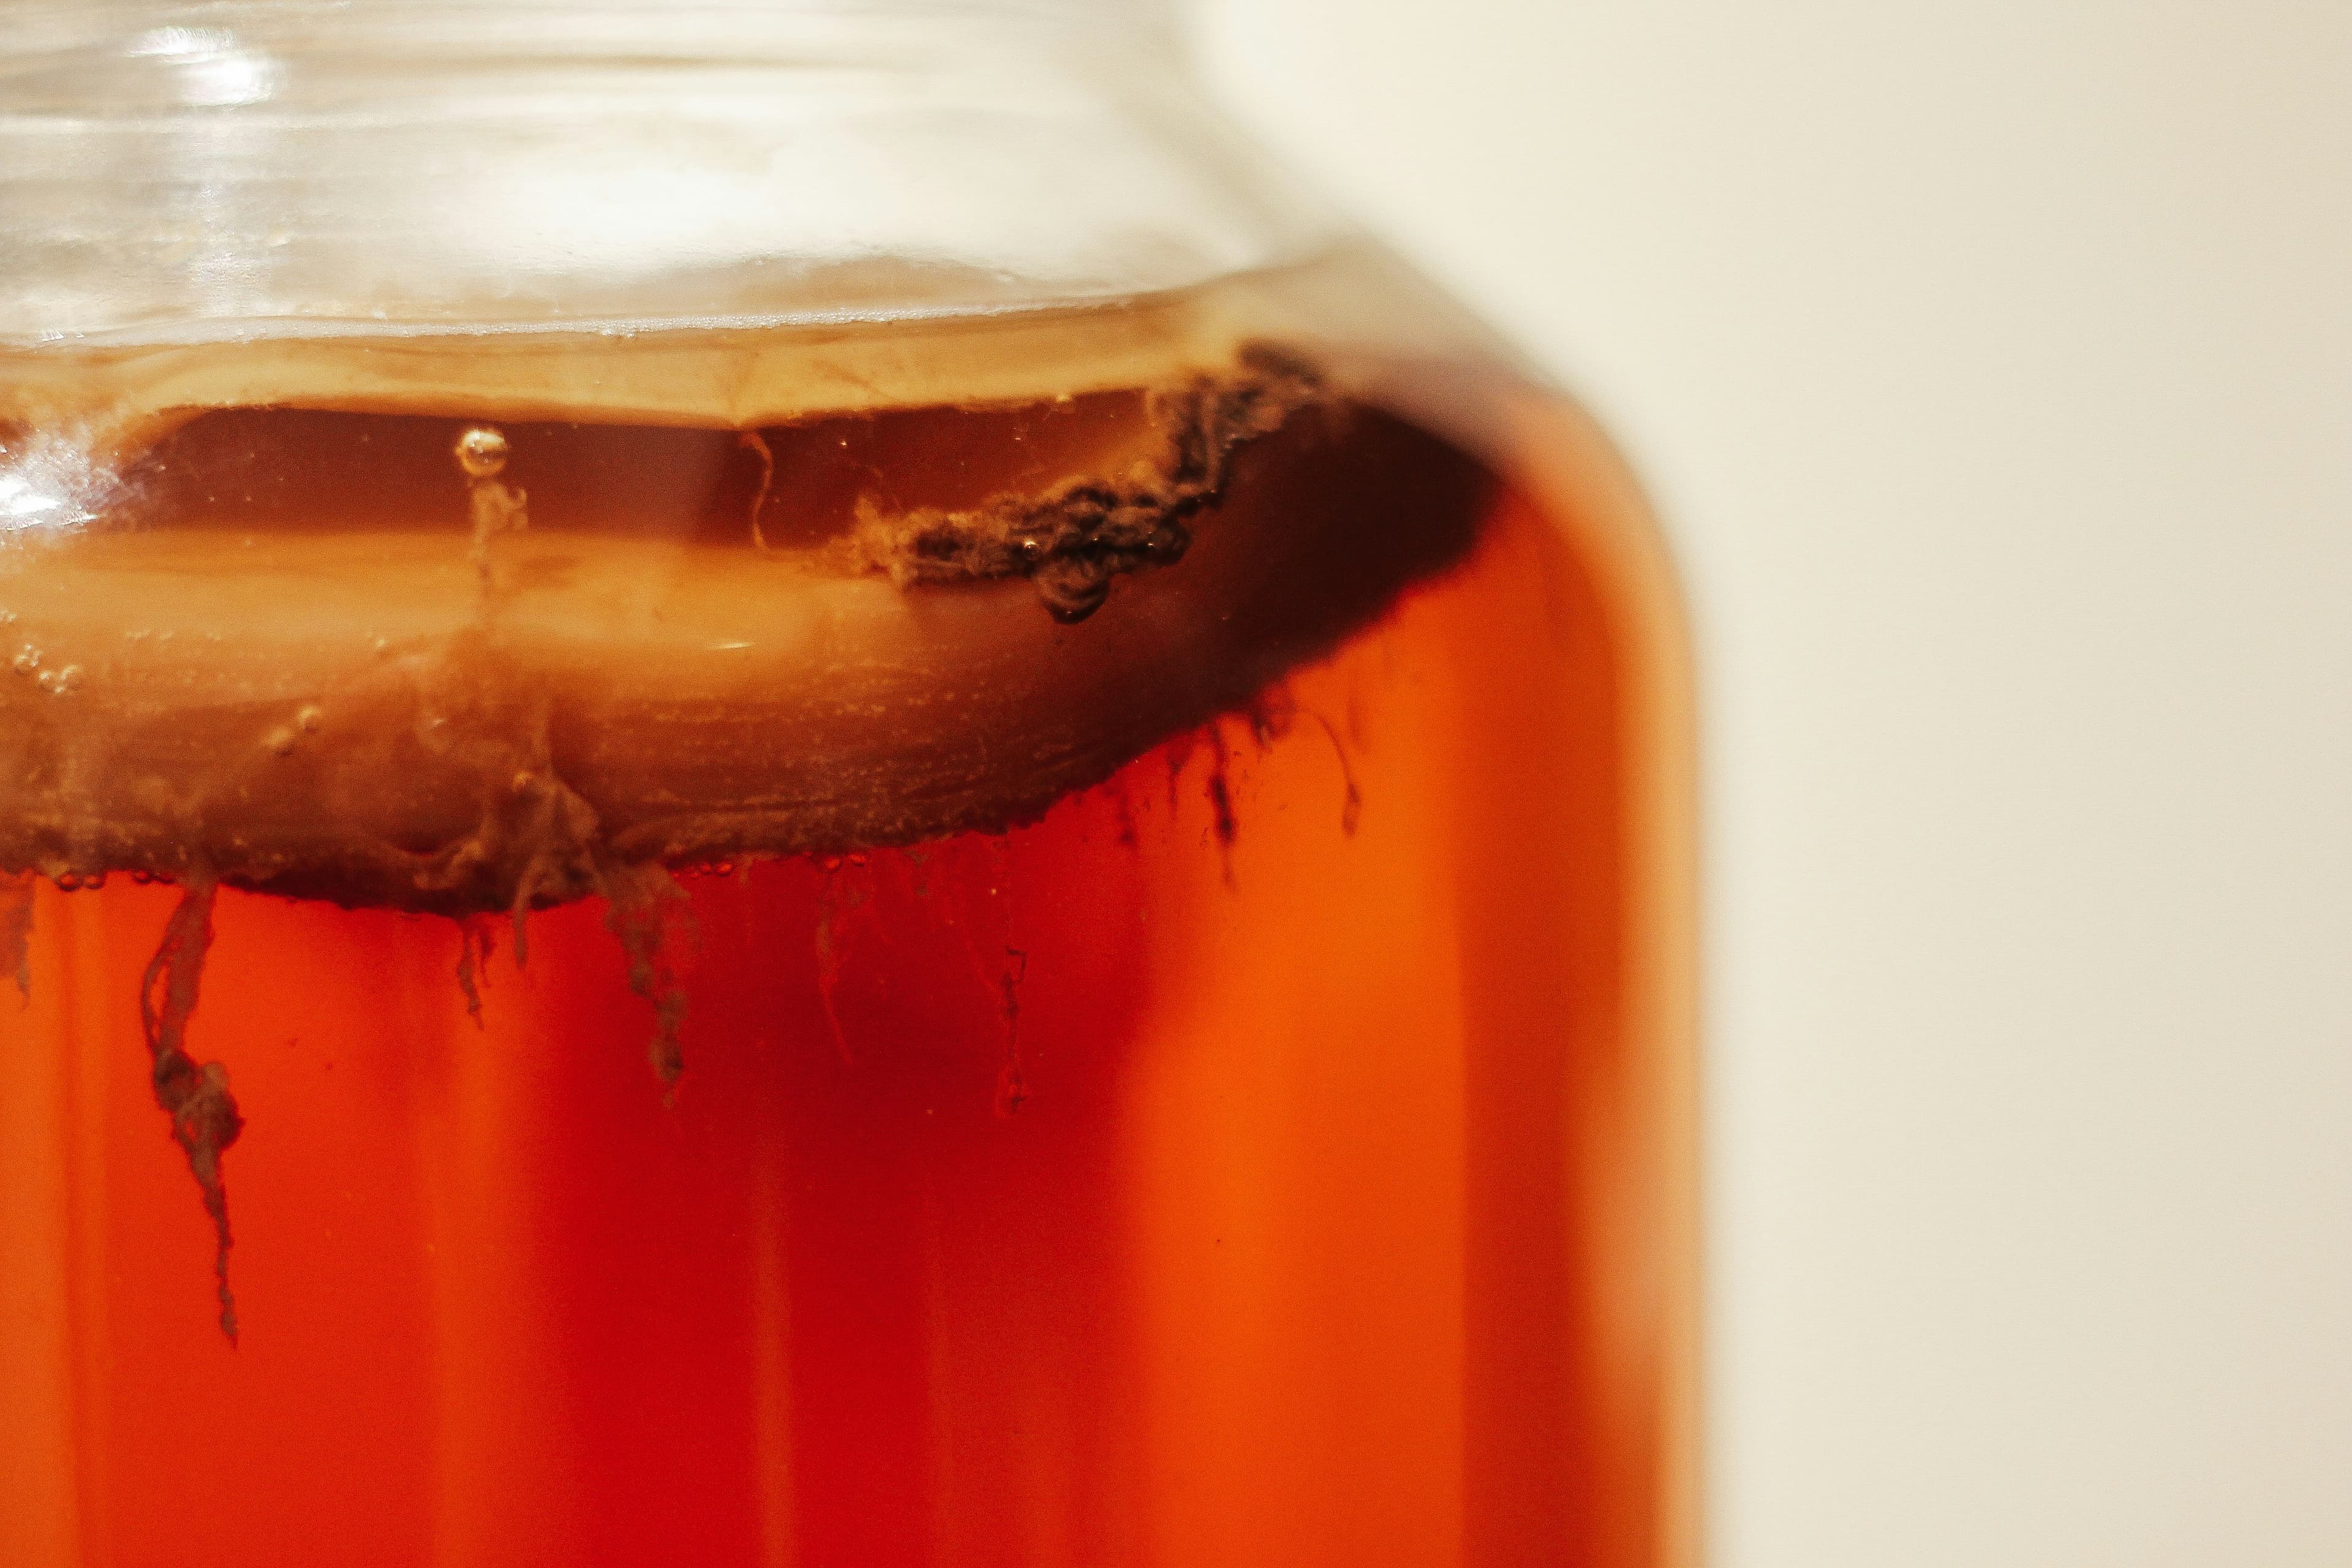
💡 What is the mother?
The ACV “mother” is a colony of acetic acid bacteria (and some cellulose) that forms a gelatinous film on the surface of the liquid during acetification. It looks like a thin, somewhat translucent disc or slime layer. It's the same organism responsible for making wine vinegar and balsamic. Raw, unfiltered ACV that contains the mother is often sold at a premium — you can grow your own from scratch.
Apple Scraps vs. Fresh Juice
Both work. The practical difference is flavor depth and timing.
Apple scraps (cores and peels from baking, pressing, or eating) produce a more complex, tannic vinegar with more apple character — the skins contribute tannins and wild yeast. The tradeoff is a longer first fermentation (2–3 weeks) and a straining step. Fall apple season makes this the natural approach.
Fresh or store-bought apple juice (unpasteurized preferred — the wild yeast is still alive) skips the scrap step and tends to ferment more predictably. Pasteurized juice will ferment if you add a small amount of wild or commercial yeast or a live ACV starter, but it takes longer to get going.
The First Fermentation in Detail
Fill the jar with apple scraps. Pack cores and peels into your wide-mouth jar to about two-thirds full. If using juice, pour it directly. Add the sugar or honey to scrap batches — the extra sugar gives the yeast more to eat and speeds up fermentation. Stir to dissolve.
Add filtered water to cover. Leave an inch of headspace at the top. If using tap water, let it sit out for an hour first — chlorine can inhibit fermentation.
Cover with cheesecloth and wait. Secure the cloth with a rubber band. Keep at 65–75°F (18–24°C). Stir once daily for the first week, pushing the scraps down below the liquid line to prevent mold from forming on exposed surfaces. After 5–7 days you'll see bubbling — that's the yeast working. By week 2–3, the bubbling slows and the liquid smells yeasty and faintly boozy.
Strain. When bubbling has mostly stopped (usually week 2–3), strain out all solids through cheesecloth lined over a fine mesh strainer. Squeeze the cloth to extract all the liquid. Discard the solids. You now have raw hard cider.
The Second Fermentation in Detail
Transfer to a clean jar. Pour the strained liquid into a clean, wide-mouth jar. Wider jars work better for the second stage because the acetic acid bacteria need surface contact with air — a wider opening means more oxygen exposure and faster acetification.
Cover and leave undisturbed. Cover with fresh cheesecloth or a breathable cloth. Do not stir during the second stage — the mother forming on the surface is fragile. Keep at room temperature (65–80°F) out of direct sunlight. A thin film will start appearing on the surface within 1–2 weeks. This is the mother beginning to form.
Taste after 4–5 weeks total. Carefully draw off a small amount with a clean straw inserted beneath the mother layer. It should taste sharp and vinegary with apple notes. If it still tastes like hard cider or is only mildly sour, it needs more time. Leave for another week and taste again.
Check the pH if you want confirmation. Use pH strips to verify. Finished ACV should read 2.5–3.5. Commercial ACV is standardized to 5% acidity — homemade ACV may be slightly lower or higher depending on how much alcohol was produced in stage one and how long stage two ran.
Bottle. Carefully pour the finished vinegar into dark glass bottles, including a piece of the mother if you want it in the final product (it's fine to eat). Store at room temperature out of direct sunlight. Vinegar is self-preserving — the acidity prevents spoilage indefinitely.
What the Mother Looks Like — and What's Normal
The mother can look a few different ways during formation and none of them are alarming:
- Thin translucent film on the surface: Early mother formation. Normal.
- Thick, rubbery disc: Mature mother. This can be saved and used to start your next batch, just like a kombucha SCOBY.
- Strands hanging down into the liquid: Older mother or fragments. Completely fine — this is just the colony dispersing a bit.
- White, cloudy liquid: Normal. Raw, unfiltered ACV is cloudy from bacterial activity and suspended mother fragments.
What is not the mother: fuzzy mold. If you see actual fuzzy growth — green, black, or fuzzy white — discard the batch. This is rare if you started with enough acidity (a tablespoon of live ACV starter) and keep the scraps submerged during stage one.
Troubleshooting
Mold during stage one
Usually caused by apple scraps floating above the liquid line. Stir daily and weight the scraps down with a small jar or weight. Adding a tablespoon of live ACV at the start acidifies the liquid immediately, making it inhospitable to mold.
No mother forming after 3 weeks
The jar may be too cold (below 60°F) or the alcohol content from stage one was too low. Move the jar somewhere warmer. If you suspect the hard cider stage was very short, consider adding a tablespoon of raw ACV with live mother to introduce the acetic acid bacteria directly.
Still tastes alcoholic at week 6
The acetification is incomplete. This can happen if the jar is too sealed (limited oxygen) or too cold. Make sure the cloth cover is breathable and the environment is 65–80°F. A wider-mouthed jar also helps expose more surface area to air.
Very sharp, intense vinegar
Fermented longer than needed, or the apple sugar content was high. This is not a problem — just dilute it with water for salad dressings, or use it as a cleaning vinegar. It's not unsafe.
How to Use Homemade ACV
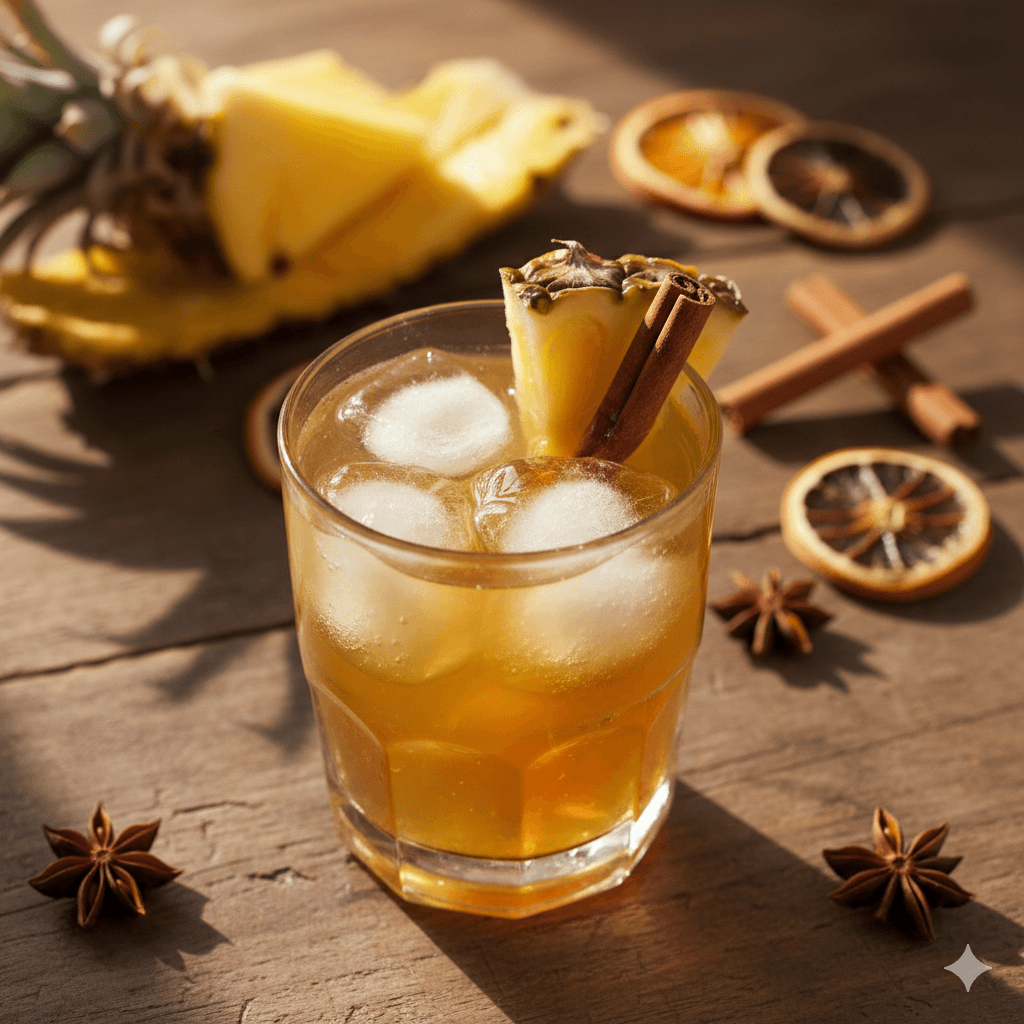
The classic uses apply: salad dressings, marinades, shrubs and drinking vinegars, and pickles (though homemade ACV with variable acidity is not recommended for shelf-stable canning — use it for refrigerator pickles and fresh applications). Shrubs — drinking vinegars made by combining vinegar, fruit, and sugar — are one of the best ways to use a good homemade ACV.
A tablespoon in a glass of water is the traditional daily use if you're making it for health reasons. The acidity is real. The research on specific health benefits is thinner than the marketing suggests — we'll let you draw your own conclusions — but it's a good vinegar regardless.
Saving Your Mother for the Next Batch
Once you have a healthy mother, you can use it to start future batches of vinegar immediately — apple or otherwise. Transfer the mother to a jar of freshly fermented hard cider (or wine, or kombucha), cover with cloth, and the acetification stage will begin much faster than growing a mother from scratch. This is called a “vinegar starter” and it's how commercial and home vinegar makers maintain continuous production.
If you make kombucha, you already understand the logic of maintaining a live culture across batches. The same applies here. A healthy mother makes every subsequent batch faster and more reliable.