Why Labeling Matters More Than You Think
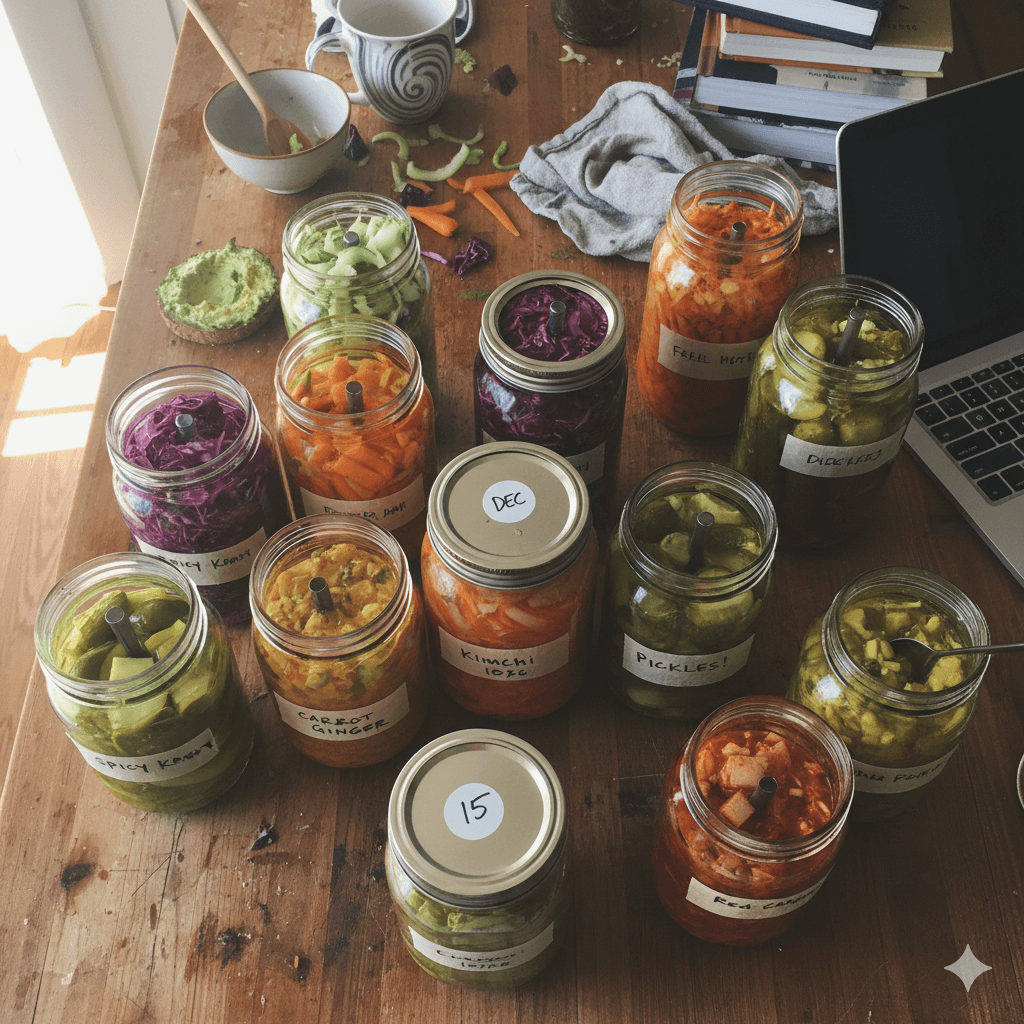
Every fermenter eventually hits the same wall: you open the fridge and find three unlabeled jars of something. One might be sauerkraut from last week. Another could be kimchi from a month ago. The third? No idea. Is it safe? Is it done? When did you even start it?
Labeling isn't fussy or unnecessary — it's the thing that keeps your fermentation practice sustainable. When you have two or three projects going at once (and you will), labels and a basic system are the difference between confidence and guesswork.
What to Put on Every Label
You don't need a fancy system. Every label needs exactly three things:
- What it is — “Sauerkraut,” “Kimchi (spicy),” “Kombucha F2 — ginger lemon”
- The date you started it — this is the most important one. Fermentation timelines are everything.
- When to check it — “Taste on Jan 15” or “Move to F2 on Jan 20.” Future you will thank present you.
That's it. You don't need to write the recipe, the salt percentage, or the phase of the moon. Just the name, the start date, and the next action date.
Labeling Methods That Actually Work
Dissolvable Labels
Dissolvable canning labels are the best option for mason jar ferments. Write on them with any pen, stick them on, and when the ferment is done, the label dissolves in water. No scraping, no sticky residue, no wrestling with old tape. They come in packs of 200 for about $10 — dirt cheap for the convenience.
Chalk Markers on Glass
Liquid chalk markers let you write directly on glass jars. They look clean, they're easy to read, and they wipe off with a damp cloth. This works especially well if you reuse the same jars for the same ferments — you're just updating the date each time.
One downside: chalk can smudge if you handle the jars a lot. If your jars get moved around frequently, stick with adhesive labels instead.
Masking Tape and Marker
The old reliable. Tear off a strip of masking tape or painter's tape, write the details, stick it on. It's not pretty, but it works and you probably already have the supplies. The tape peels off cleanly from glass (usually). Good enough beats perfect every time.
💡 Color coding
If you're running multiple types of ferments, use different colored tape or markers for different categories. Blue for dairy ferments, green for vegetables, red for hot sauces. It sounds overboard, but when you're scanning a shelf of jars, color jumps out faster than reading labels.
Organizing Your Fermentation Space
Designate a Fermentation Station
Pick one spot in your kitchen (or a shelf, a corner of the counter, wherever) and make it the fermentation zone. All active ferments live there. This sounds obvious, but when jars start migrating — one on the counter, one on top of the fridge, one behind the cereal — things get forgotten.
A single shelf or tray keeps everything visible and together. If you can see it, you'll tend to it. Out of sight is out of mind, and out of mind is how you end up with a jar of six-month-old something in the back of the pantry.
Separate Active from Aging
Not all ferments need daily attention. Your active projects (things that need burping, stirring, or checking) should be front and center. Long-term projects — aging cheese, a batch of mead, miso that won't be ready for months — can go in a more out-of-the-way spot. Just make sure those are labeled clearly so you don't accidentally open or disturb them.
Use a Tray or Rimmed Baking Sheet
Put your active ferments on a rimmed tray or baking sheet. Ferments sometimes bubble over, leak, or sweat condensation. A tray catches all of it and saves your shelf or counter. It also makes it easy to move everything at once when you need to clean.
Tracking Timelines
The Simple Approach: A Calendar or Phone Reminder
Set a reminder on your phone for when each ferment needs attention. “Check sauerkraut — Day 7” or “Bottle kombucha F2.” This takes 10 seconds when you start a batch and prevents the most common problem: forgetting about it entirely.
A Fermentation Journal (If You Want to Level Up)
A notebook where you track your batches is the single best tool for improving as a fermenter. For each batch, jot down:
- What you made and when you started
- Key details: salt percentage, temperature, ingredients, anything you varied
- What happened: how long it took, what it tasted like, what you'd change next time
This doesn't need to be elaborate. A few lines per batch in a cheap notebook is enough. The value shows up over time — when you're trying to remember what salt ratio made the best sauerkraut, or whether 5 days or 7 days was better for your last batch of pickles.
📱 Digital option
A shared note (Apple Notes, Google Keep, Notion — whatever you already use) works just as well as a physical journal. Create a note per batch with the date, recipe, and tasting notes. The best system is the one you'll actually use.
Managing Multiple Ferments at Once
Once you get going, it's common to have three, four, or more ferments running simultaneously. Here's how to keep it from getting chaotic:
- Stagger your start dates. Don't start five ferments on the same day. They'll all need attention at the same time. Space them out by a few days so your tasks are distributed.
- Batch your check-ins. Pick a time each day (morning coffee, after dinner) to check all your ferments at once. Burp jars, taste things, check airlocks. Making it a routine prevents anything from slipping through the cracks.
- Know your commitment level. Kombucha and sourdough starters need regular feeding. A jar of sauerkraut just sits there. Mead ferments for months with zero attention. Match your active ferment count to the time you actually have.
Common Mistakes
Not labeling “because I'll remember”
You won't. Everyone thinks they will. No one does. Label it the moment you seal the jar. It takes five seconds.
Storing ferments where you can't see them
A ferment tucked behind other things in the fridge or pantry is a ferment you'll forget about. Keep active projects visible. If space is tight, at least keep a list on the fridge of what's fermenting and where.
Over-complicating the system
You don't need a spreadsheet, a custom app, or a color-coded filing system. A label on the jar and a phone reminder is plenty for most people. Add complexity only if and when you actually need it. The goal is to ferment more, not to build a tracking system.
The Starter Kit
If you're setting up from scratch, here's what to grab:
- Dissolvable labels — the cleanest option for jar labeling
- Chalk markers — for writing directly on glass
- A notebook or notes app — for tracking batches over time
- A rimmed baking sheet — to catch drips and keep things tidy
Browse our full list of recommended fermentation tools for labels, markers, and everything else you need to stay organized.