The Simple Truth About Home Fermentation
Fermenting food at home is one of the most straightforward things you can do in the kitchen. It doesn't require special skills, expensive equipment, or a science degree. At its most basic, you're combining food with salt, putting it in a jar, and letting beneficial bacteria do the rest.
This guide is your practical reference for the “how” of fermentation. Not the history or the health benefits (we cover those in our Fermentation for Beginners and Fermented Foods Benefits guides) — just the hands-on knowledge you need to start fermenting successfully today.
The Two Methods You Need to Know
Almost every vegetable ferment uses one of two methods. Once you understand both, you can ferment virtually anything.
Method 1: Dry Salting
Used for vegetables with high water content that release their own liquid when salted. You chop or shred the vegetables, toss them with salt, massage or pound them until they release juice, then pack everything tightly into a jar so the vegetables sit below their own liquid.
Best for: cabbage (sauerkraut, kimchi), shredded carrots, beets, radishes, onions
Method 2: Brine Submersion
Used for whole or large-cut vegetables that don't release enough liquid on their own. You prepare a salt water solution (brine), place the vegetables in a jar, and pour the brine over them until everything is submerged.
Best for: whole cucumbers (pickles), green beans, cauliflower, peppers, garlic cloves, mixed vegetable medleys
💡 How to choose
If you can squeeze water out of it easily (cabbage, zucchini, grated beets), use dry salting. If it holds its shape and doesn't release much liquid (whole cucumbers, carrot sticks, green beans), use a brine.
Salt: Getting the Ratio Right
Salt is the single most important variable in fermentation. It controls the speed of fermentation, the texture of your vegetables, and which bacteria thrive. Too little salt and you risk off-flavors, mush, or mold. Too much and fermentation stalls.
For Dry Salting
Use 2% salt by weight of the total vegetables. This is the sweet spot for most ferments.
Here's how to calculate it:
- Weigh your prepared vegetables in grams
- Multiply by 0.02
- That's how many grams of salt to add
Example: 1,000g of shredded cabbage × 0.02 = 20g of salt
For Brine Submersion
Use a 3–5% brine (salt dissolved in water). The standard starting point is 3.5%.
Here's how to make it:
- For every 1 liter (1,000g) of water, dissolve 35g of salt
- Stir until fully dissolved
- Let it cool to room temperature before pouring over vegetables
Quick Salt Reference
- 2% (dry salt) — standard for sauerkraut, kimchi, and most shredded vegetable ferments
- 3% brine — lighter brine for quick ferments and delicate vegetables
- 3.5% brine — the all-purpose brine. Works for pickles, green beans, cauliflower, and most brine ferments
- 5% brine — stronger brine for hot climates, longer ferments, or when you want extra crunch in pickles
💡 Always weigh your salt
Different salts have wildly different volumes for the same weight. A tablespoon of fine sea salt weighs nearly twice as much as a tablespoon of coarse kosher salt. Weighing with a kitchen scale eliminates all guesswork and is the single easiest way to improve your results.
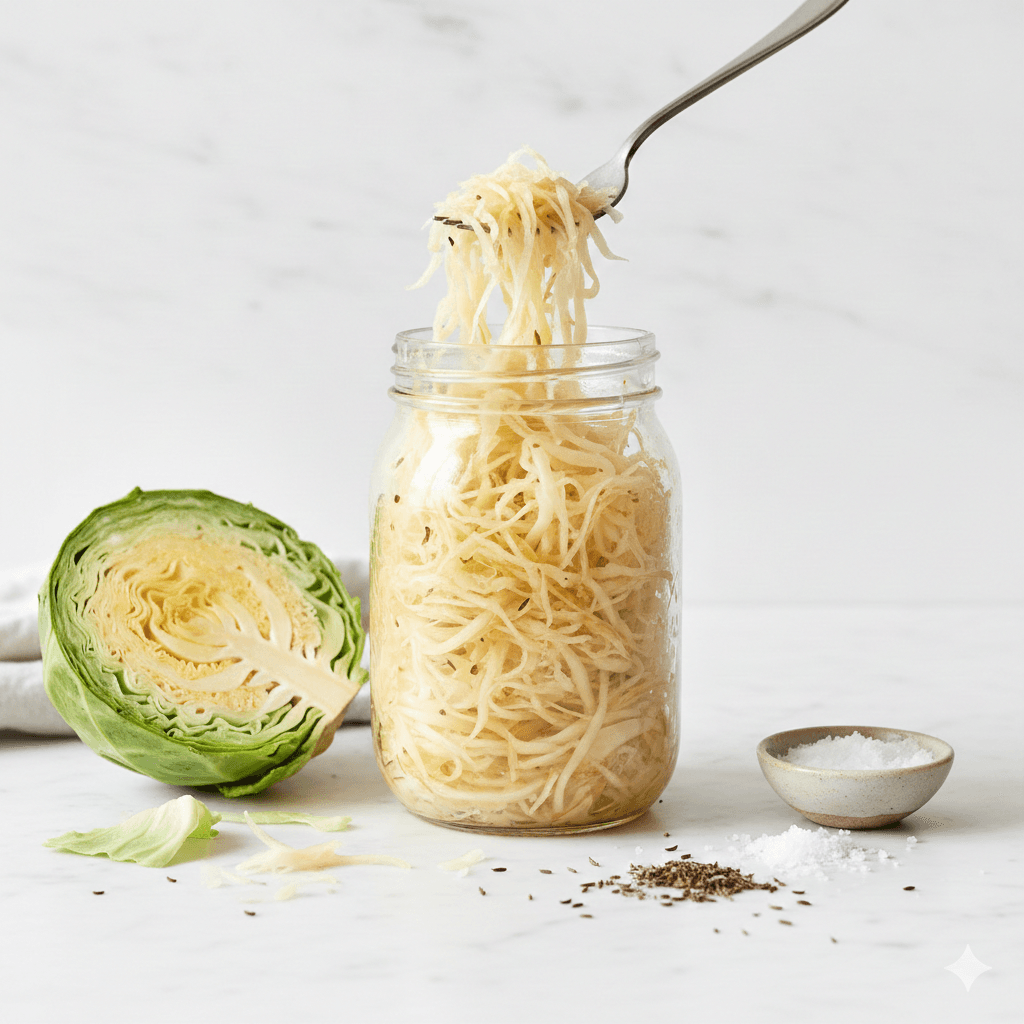
Step-by-Step: Your First Dry Salt Ferment
Let's walk through the process using sauerkraut as the example. This same method applies to any dry-salted vegetable ferment.
Prep your vegetables. Remove outer leaves from a head of cabbage. Quarter it, cut out the core, and shred it thinly. Weigh the shredded cabbage.
Add salt. Calculate 2% of the weight in salt. Sprinkle the salt over the cabbage in a large bowl.
Massage. Squeeze and massage the cabbage with your hands for 5–10 minutes. You'll feel it soften and start to release liquid. Keep going until there's a pool of brine at the bottom of the bowl and the cabbage looks wet and limp.
Pack the jar. Transfer the cabbage and all the liquid into a clean wide-mouth mason jar. Press down firmly with your fist or a tamper to remove air bubbles and force the liquid above the cabbage. The brine should cover the cabbage completely.
Weight it down. Place a fermentation weight or a small zip-lock bag filled with brine on top to keep everything submerged. This is critical — anything above the brine line is exposed to oxygen and can develop mold.
Cover and wait. Cover the jar with a fermentation lid, cloth, or loosely placed regular lid (don't tighten — gas needs to escape). Place the jar on a plate (to catch any overflow) in a spot out of direct sunlight. Room temperature, 65–75°F (18–24°C).
Check daily. Press vegetables down if they float above the brine. Burp the lid if using a regular lid. Taste starting around day 5. When it's tangy enough for your liking, move the jar to the fridge to slow fermentation. Most sauerkraut is great at 1–4 weeks.
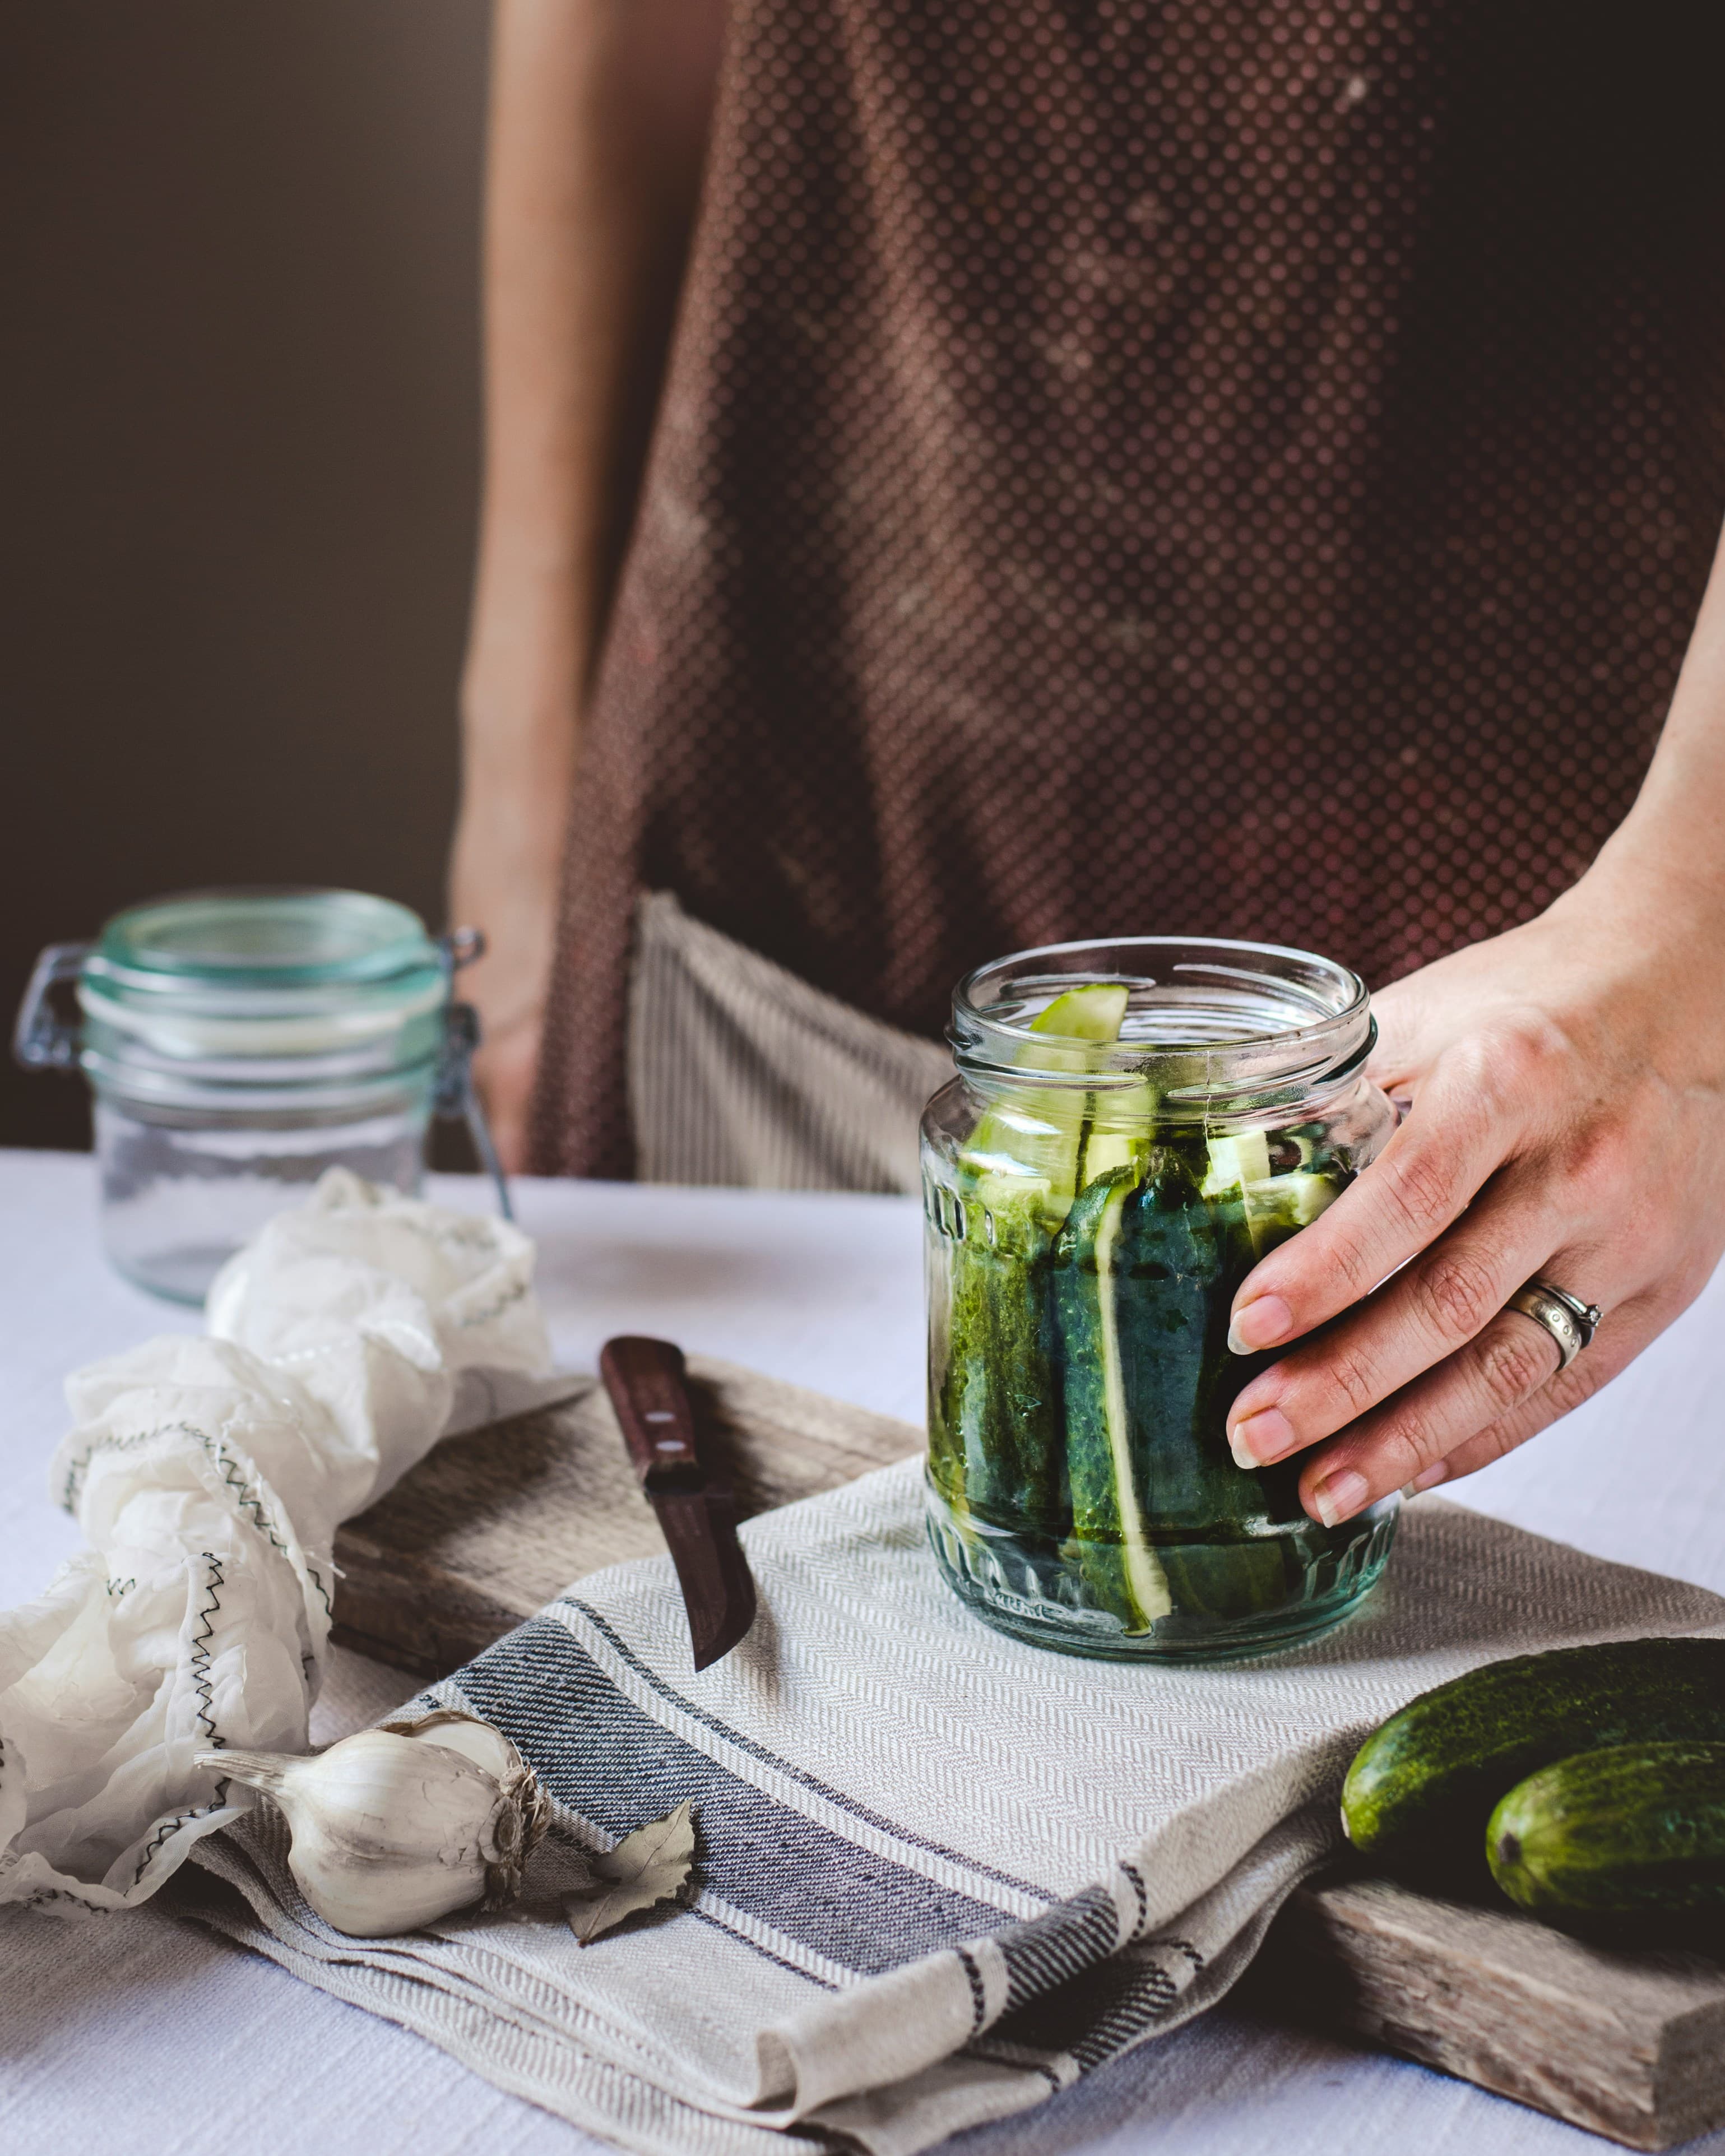
Step-by-Step: Your First Brine Ferment
Now the brine method, using pickles as the example.
Prepare the brine. Dissolve 35g of salt in 1 liter of water (3.5% brine). Stir until clear. Let cool to room temperature.
Prep the vegetables. Wash cucumbers thoroughly. Trim the blossom end (the end opposite the stem) — it contains enzymes that can make pickles soft. Leave whole for half-sour pickles or cut into spears.
Add aromatics. Place garlic cloves, dill, mustard seeds, peppercorns, or whatever spices you like in the bottom of your jar. This is where you get creative.
Pack and pour. Pack the cucumbers tightly into the jar (tight packing helps keep them submerged). Pour the cooled brine over them until completely covered, leaving about an inch of headspace.
Weight, cover, and wait. Same as dry salting — weight to keep vegetables submerged, cover to allow gas release, place out of direct sunlight. Fermented pickles are usually ready in 3–7 days depending on temperature and size.
Temperature and Timing
Temperature is the gas pedal of fermentation. Understanding it gives you control over speed and flavor.
Temperature Guide
- 60–65°F (15–18°C) — slow fermentation. Best for long-term projects like sauerkraut and miso. Produces complex, nuanced flavors. Takes weeks to months.
- 65–75°F (18–24°C) — the sweet spot. Most ferments do well here. Good balance between speed and flavor development. 1–4 weeks for most projects.
- 75–85°F (24–29°C) — fast fermentation. Good for quick projects like tepache or quick pickles. Produces more sour, punchy flavors. 2–5 days for many ferments.
- Above 85°F (29°C) — risky. Fermentation can get ahead of itself, producing off-flavors or mushy textures. If your kitchen is this warm, use a higher salt percentage or find a cooler spot.
How to Know When It's Done
There's no single “done” point for most ferments — it's a spectrum. Here's how to tell when things are where you want them:
- Taste it — this is your most reliable tool. Is it tangy enough? Sour enough? If it still tastes mostly like raw vegetables, give it more time.
- Bubbles — active bubbling means fermentation is happening. When bubbling slows significantly, the most active phase is over.
- Aroma — it should smell pleasantly sour and tangy, like pickles or sauerkraut. Not rotten, not like garbage.
- Texture — vegetables should retain some crunch. If they're getting soft, it may be time to refrigerate.
When you're happy with the flavor, move the jar to the fridge. Cold temperatures dramatically slow fermentation, essentially pausing the process. Most fermented vegetables will keep for months in the fridge.
Troubleshooting Common Problems
White film or scum on the surface (kahm yeast)
A thin white film on the brine surface is kahm yeast. It's harmless but can give a slightly off flavor if left unchecked. Skim it off with a spoon and make sure your vegetables stay submerged. It's more common in warmer temperatures and lower-salt ferments.
Fuzzy mold (green, black, white, or pink fuzz)
Actual mold is fuzzy and raised — it looks like what grows on old bread. If it's on a small area of the surface and hasn't penetrated the brine, you can scoop it off along with an inch of surrounding vegetables. If it's widespread, below the brine, or the ferment smells off — discard and start over. Prevention: keep vegetables submerged and use enough salt.
Soft or mushy vegetables
Usually caused by too little salt, too high temperature, or fermenting too long. For crunchy pickles, use the blossom-end trim trick, ferment at cooler temperatures, and use a slightly higher salt brine (4–5%). Adding a grape leaf or oak leaf (which contain tannins) can also help maintain crunch.
Too salty
You used too much salt, or it hasn't fermented long enough. Give it more time — the bacteria consume salt as they work, so the flavor will mellow. You can also rinse fermented vegetables briefly before eating if they're still too salty after fermentation.
Not sour enough
Give it more time. Sourness develops gradually as lactic acid builds up. If it's been over a week and nothing seems to be happening, your environment may be too cold. Move the jar to a warmer spot or be patient.
Overflowing jar
Active fermentation produces CO2, which can push brine up and over the rim. Always leave at least an inch of headspace, and place your jar on a plate or tray. This is normal and a sign that things are working.
Beyond Vegetables: Other Things to Ferment at Home
Once you're comfortable with basic vegetable fermentation, the world opens up. Here's what else you can make at home:
- Kombucha — fermented tea. Requires a SCOBY (symbiotic culture of bacteria and yeast) as a starter.
- Water kefir — a fizzy probiotic soda made with water kefir grains and sugar water. Faster than kombucha.
- Milk kefir — tangy, drinkable fermented milk. Like yogurt but with more diverse bacterial cultures.
- Yogurt — heat milk, add a spoonful of existing yogurt as starter, keep warm for 6–12 hours.
- Sourdough — wild-yeast bread. Requires building a starter over about a week, then you can bake with it indefinitely.
- Hot sauce — blend fermented chili peppers into a sauce with more depth and complexity than anything cooked.
- Tepache — fermented pineapple drink from Mexico. Uses pineapple scraps and is ready in 2–3 days.
- Beer and mead — alcohol fermentation. More equipment involved but deeply rewarding.
Setting Up Your Fermentation Station
You don't need a dedicated space, but having a consistent spot helps. Here's what makes a good fermentation station:
- Out of direct sunlight — UV light can inhibit beneficial bacteria. A kitchen counter away from windows, a pantry shelf, or the top of the fridge all work.
- Stable temperature — avoid spots near ovens, heaters, or exterior walls that fluctuate. Consistency matters more than hitting an exact number.
- Easy to monitor — somewhere you'll see it daily so you remember to check on your ferments and burp lids if needed.
- A tray underneath — active ferments can overflow. A sheet pan or plate catches any spills and saves your counter.
Check out our recommended tools for a curated list of jars, weights, lids, and other supplies that we actually use and recommend.
💡 Start today, not tomorrow
The biggest barrier to fermentation isn't knowledge or equipment — it's overthinking it. Grab a head of cabbage, some salt, and a jar. Follow the dry salt method above. In a week, you'll have homemade sauerkraut and the confidence to try anything. There's no substitute for doing it.